

Learn Cursive Handwriting Step by Step: A Complete Guide for Beginners
Beautiful handwriting is not just about appearance. It is also about practice, patience, consistency, and proper technique.
If you have always wanted to learn cursive handwriting but didn't know where to start, our Complete Cursive Handwriting Course is designed to help you learn step by step.
Whether you are a beginner, a student, a parent helping a child, or someone who simply wants to improve handwriting, this course takes you from the basics of cursive writing to letters, joining, words, sentences, paragraphs, and handwriting improvement.
What Is Cursive Handwriting?
Cursive handwriting is a beautiful writing style in which letters are written with smooth and connected strokes. Instead of writing every letter separately, letters are connected to create a natural flow while writing words.
Learning cursive handwriting is a gradual process. With proper guidance, regular practice, patience, and consistency, you can work toward developing smoother, neater, and more confident handwriting.
Complete Cursive Handwriting Course Structure
Our Complete Cursive Handwriting Course follows a simple and structured learning approach.
The course is divided into 9 sections and 14 lectures. Each section builds on the previous one, taking students step by step from basic strokes to letters, joining, words, sentences, paragraphs, and handwriting improvement.
Section 1: Introduction
Lecture 1 — Introduction to Cursive Handwriting
We begin the course with an introduction to cursive handwriting and the learning journey ahead.
Students will understand how the course is structured and how regular practice and assignments can help them improve their handwriting.
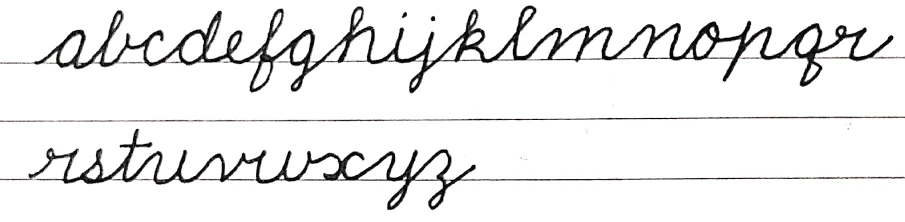
Before starting the course, students will also complete their first handwriting sample. This sample will provide a starting point that can be compared with their handwriting at the end of the course.
Section 2: Basic Cursive Strokes
Lecture 2 — Basic Cursive Strokes
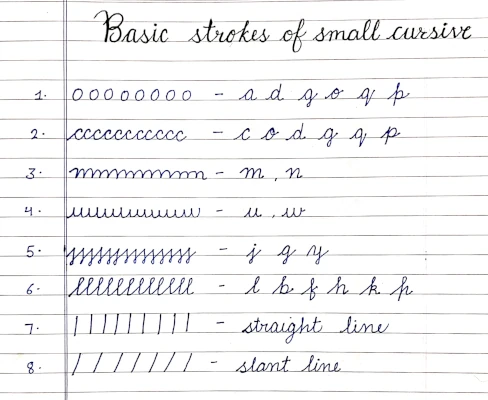
Before learning individual cursive letters, students are introduced to basic cursive strokes.
These strokes help students become familiar with the movements required for cursive writing and prepare them for forming individual letters.
Students are encouraged to practice these strokes slowly and carefully before moving forward.
Section 3: Small Cursive Letters
Lecture 3 — Small Cursive Letters a–i
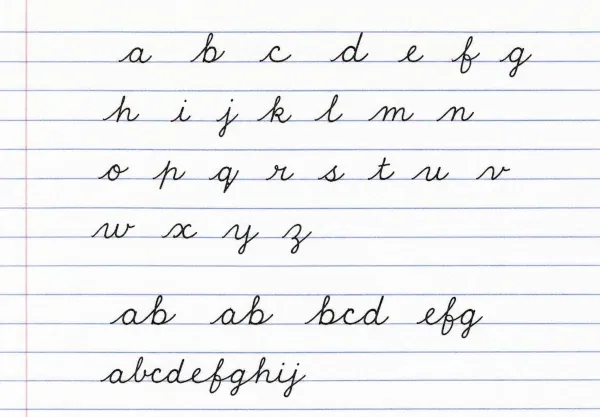
Students begin learning small cursive letters step by step, starting with a to i.
The focus is on correct letter formation, proper size, alignment, consistency, and neat handwriting.
Practice Assignment: After completing this lesson, students can complete the assigned practice exercise to reinforce the letters learned in this lesson.
Lecture 4 — Small Cursive Letters j–r
Students continue learning the next group of small cursive letters, j to r.
Each letter is practiced step by step, with attention to correct formation and consistency.
Lecture 5 — Small Cursive Letters s–z
In this lesson, students learn the final group of small cursive letters, s to z.
After completing this lesson, students will have practiced the complete set of small cursive letters from a to z.
Section 4: Joining Small Cursive Letters
Lecture 6 — How to Join Letters
Letter joining is one of the most important parts of cursive handwriting.
In this lesson, students learn the basic concept of joining letters and how to create smooth connections between letters.
The lesson focuses on:
- Smooth movement
- Joining strokes
- Proper spacing
- Consistent writing flow
Understanding these basic joining techniques will make it easier to move from individual letters to complete words.
Lecture 7 — Joining Two Small Cursive Letters
After understanding the basic joining technique, students begin practicing two small cursive letters together.
This helps students understand how one letter connects naturally to another.
This lesson includes three practice assignments — Assignment #5, Assignment #6, and Assignment #7.
Section 5: Capital Cursive Letters
Lecture 8 — Capital Cursive Letters A–I
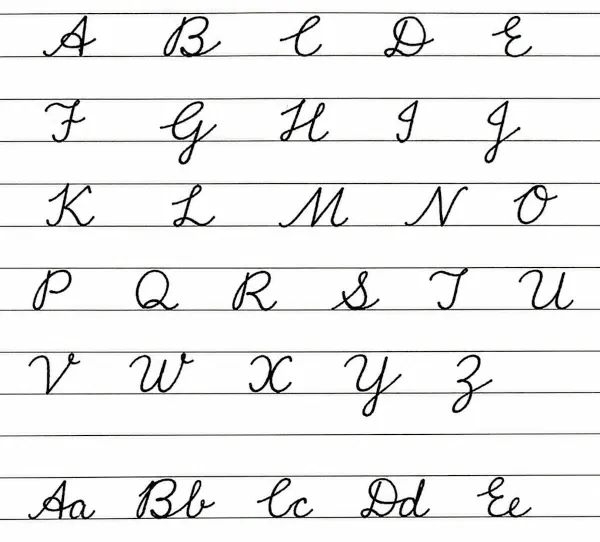
The course now moves to capital cursive letters, beginning with A to I.
Students learn each capital letter step by step while focusing on proper formation, size, shape, alignment, and consistency.
Lecture 9 — Capital Cursive Letters J–R
Students continue learning capital cursive letters from J to R.
Each letter is practiced carefully to develop better control and consistency.
Lecture 10 — Capital Cursive Letters S–Z
In this lesson, students learn the final group of capital cursive letters, S to Z.
After completing this lesson, students will have practiced the complete capital cursive alphabet from A to Z.
Section 6: Capital & Small Letter Joining
Lecture 11 — Joining One Capital and One Small Cursive Letter
In many words, the first letter is capitalized while the remaining letters are written in lowercase.
In this lesson, students learn how to work with one capital cursive letter followed by one small cursive letter.
This helps students understand the transition between capital and small cursive letters and prepares them for writing words that begin with capital letters.
Section 7: Cursive Word Writing
Lecture 12 — Three and More Letter Words
Once students are comfortable with individual letters and joining, they move on to writing complete words.
Students practice three-letter and longer words, focusing on smooth joining, consistent letter size, proper spacing, correct formation, and overall handwriting flow.
This is an important step toward writing naturally in cursive.
Section 8: Sentence & Paragraph Writing
Lecture 13 — Sentence and Paragraph Writing
The next step is to bring everything together by writing complete sentences and paragraphs in cursive handwriting.
Students practice maintaining consistent letter size, proper spacing, alignment, slant, and writing flow while writing longer pieces of text.
Section 9: Handwriting Improvement
Lecture 14 — Common Cursive Handwriting Mistakes & Final Improvement
The final lesson focuses on identifying and improving common cursive handwriting mistakes.
Students learn to recognize areas such as:
- Incorrect letter formation
- Incorrect letter joining
- Uneven letter size
- Inconsistent slant
- Poor spacing
- Alignment and baseline issues
- Writing too fast
- Inconsistent handwriting
The goal is to help students identify areas that need more practice and work toward more consistent handwriting.
Practice Is an Important Part of Learning
Cursive handwriting is a practical skill. Watching a lesson is only the beginning. Real improvement comes from regular writing practice.
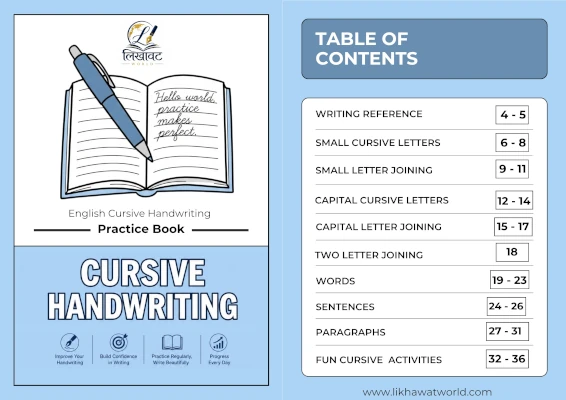
That's why the course includes a Cursive Handwriting Practice Book with structured exercises that students can complete alongside the lessons.
Students are encouraged to practice carefully and focus on correct formation and smooth writing, rather than simply trying to write quickly.
Assignments & Handwriting Review
Different lessons include practice assignments to help students apply what they have learned.
After completing an assignment, students can take a clear photo of their completed handwriting and send it to us on WhatsApp for review.
📱 Handwriting Review
WhatsApp: 7597042124
We will review your handwriting and provide feedback and further guidance for handwriting improvement.
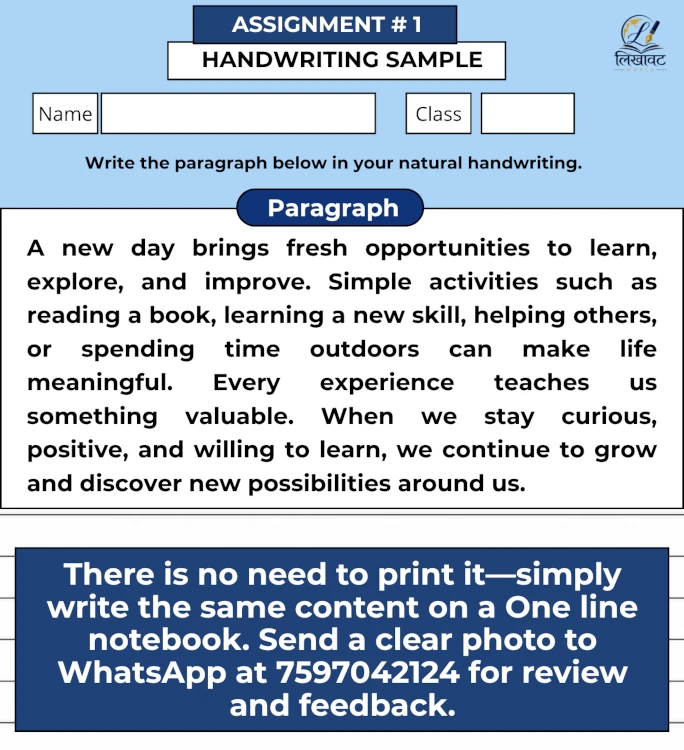
Assignment #1 — Sample Handwriting
Before starting the course, students are given a small activity to record their current handwriting.
The Assignment #1 — Sample Handwriting is attached with the course.
Students need to write the paragraph provided in the attached image in their current and natural handwriting.
At this stage, students should not try to write in cursive.
Simply write the paragraph in the same handwriting you normally use.
After completing the assignment:
- Take a clear photo of your handwriting.
- Send it to us on WhatsApp: 7597042124.
- We will review your handwriting.
- We will provide feedback and further guidance for handwriting improvement.
- Keep this first handwriting sample safely.
At the end of the course, you can compare your final handwriting with this first handwriting sample and see how your handwriting has improved.
Practice Assignments After the Lessons
Practice is an important part of this course.
After different lessons, you will receive practice assignments to help you apply what you have learned.
Complete the assignment carefully and send a clear photo of your completed work to us on WhatsApp for review.
WhatsApp: 7597042124
Regular practice and feedback can help you understand your mistakes and work toward better handwriting.
What Do You Need to Get Started?
You don't need complicated equipment to begin learning cursive handwriting.
- Single-line notebook
- Any comfortable pen
- Cursive Handwriting Practice Book
- Regular practice
- Patience and consistency
Why Regular Practice Matters
You don't need to write perfectly from the first day.
Cursive handwriting is a skill that develops gradually.
Start slowly, focus on correct letter formation, and then gradually work toward smoother and more natural writing.
If a particular letter or joining feels difficult, repeat it several times until you become more comfortable.
Correct Technique + Regular Practice + Patience = Better Handwriting
See Your Handwriting Improvement
One of the most valuable parts of this learning journey is being able to look back at your starting handwriting and compare it with your handwriting after completing the course.
Your first handwriting sample provides a starting point, while your regular practice helps you work toward better handwriting.
At the end of the course, compare your handwriting with your original sample and observe the progress you have made.
Ready to Start Your Cursive Handwriting Journey?
If you're ready to learn cursive handwriting step by step, our Complete Cursive Handwriting Course can guide you from basic strokes and individual letters to joined letters, words, sentences, paragraphs, and handwriting improvement.
Take your time, practice regularly, and enjoy the process of improving your handwriting.
Learn the strokes. Master the letters. Join them smoothly. Write with confidence.
Start the Complete Cursive Handwriting Course